1. There are many types of cards you can choose from . Design the ones that you need or that sound the most interesting to you. Try birthday, anniversary, cards for children, wedding, sympathy, holiday or get well.
2. To begin the design you will need good paper. Look for pre-folded cards or use cardstock and fold your own. Using a bone folder is helpful here because it makes a very nice clean fold. There are several sizes to choose from, make sure you have an envelope to fit or be prepared to make one. There are templates galore for this type of thing.
3. Next choose a sticker or rubber stamp for the image on the front of the card. If using stamps, try different color stamp pads until you get the design and color you like. You can layer the stickers or stamped image on other paper to create a more pleasing design. Try using a combination of plain and matching patterned paper for this step.
4. There are embellishments you can use instead of a stamp or sticker. These are often dimensional and add a lot to the design of your card.
5. Make certain you have appropriate glue. Carefully consider the adhesive you want to use. A glue gun works well for heavy items but will wrinkle most papers. Glue dots and strips are handy for many design gluing jobs. I really like the glue stick that says"heavy duty" on the label, it is good for almost any paper and dries smooth and clear.
6. Design the words next. Think about what you want the card to say. Do you want the greeting or message on the inside or on the front of the card? You can use rubber stamps for this, stickers or computer generated greetings. There are so many fonts available that every card can be unique.
7. Lay your design out on the card before you attach the different elements. Check to make sure it all fits and that you like the design. Glue everything down and making sure all pieces are secure.
8. Now look at the inside of your card. If you are going to put a message there think about layering it on other paper to match the design on the front of your card. Attach these pieces to the inside of the card.
9. Check out the whole card now. Are you happy with the design? Does it need anything extra like colored brads or buttons? Is there part of the design that would look nice colored in with marker, colored pencils, chalks or watercolors?
10. I believe a card is not finished until the fiber is added, both inside and out. Matching colors from the design, take two or three strands of coordinating ribbon, yarn, metallic thread or wire and tie into a knot. Trim the ends so it looks the way you want it. Attach with your glue gun and you are done with the card.The envelop please! To put a final touch on your design decorate the envelop to match the card. Use your markers, chalk, stickers and stamps to create an envelop that is as gorgeous as what’s inside.
In very little time you can create a special and unique card and envelop using your own design.
Please visit: ImtiazTips- Webmaster Articles & Website Design, Development Tutorial for more information
Showing posts with label tutorials. Show all posts
Showing posts with label tutorials. Show all posts
Wednesday, July 14, 2010

Monday, June 21, 2010
Paint Like Monet Using Photoshop Paintbrush Tool
 Learning to use the paintbrush in Photoshop is easy with Photoshop Fast Track. You will be creating original works of art within minutes.
The Photoshop paintbrush has more uses than you might imagine. When you get good with the paintbrush you will be able to create some awesome graphics.
Photoshop has two types of paintbrushes you will be using.
Airbrush:
The first type of paintbrush available in Photoshop is the airbrush. This paintbrush tool is very much like using a can of spray paint. It virtually sprays the paint onto the image or canvas.
Photoshop gives the user maximum control by allowing you to adjust the diffusion or amount of pain being applied as well as the speed with which it is applied to the canvas. There are also many different brush sizes and shapes you can use.
Paintbrush:
The paintbrush tool is more like using an actual paintbrush and applying paint by hand. Much like using a real paintbrush the virtual paintbrush in Photoshop applies paint in much more even distribution compared with the airbrush tool.
You will have fun experimenting with the different options available for creating digital works of art using the paintbrush in Photoshop.
The best thing about it is that you don’t have to worry about mistakes as you would on a traditional canvas using real paint.
This is especially true if you are working in layers. If you don’t like your results simply delete that layer and try something else.
Free daily email tips on mastering Photoshop and also view a Free articles. This is a a short video shows you how to remove "red-eye" from a photo.
Visit Below Links: [ The Money making of a Niche ::Free Data Entry Work :: Imtiaztips Weblog :: Free Webmaster Articles :: More iPod Articles :: Download Freeware Software :: Updated Contents about Google AdSense for NEWBIES. ::ImtiazTips Online Business ]
Monday, June 7, 2010
Transform You Old, Worn Out Photos In Minutes With Adobe Photoshop
Do you have old photographs that are faded, worn out, crinkled or even torn? Of course you do, everyone does. Many of these photos are likely very old family photographs that are simply irreplaceable should something happen to them.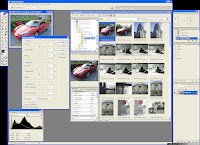 In the past it was very expensive and time consuming to have old damaged photographed restored. It usually required a photo restoration expert and sometimes the results were not really that great.
 In the past it was very expensive and time consuming to have old damaged photographed restored. It usually required a photo restoration expert and sometimes the results were not really that great.
 Digital imaging, and more specifically Adobe Photoshop, has revolutionized the process of renewing and restoring old photographs. It is amazing the results you can achieve with Photoshop. Old and damaged, even torn, photographs can be restored and renewed to their original colors and vitality using the tools available in Photoshop.
Adobe’s Photoshop is the number one choice digital photo editing software application among today’s professional photographers, graphic artists and web designers. It is not only the best but easier to work with than you might think. Many shy away from Photoshop because there are intimidated by the complexity. With the help of a good Photoshop tutorial you can begin to learn Photoshop within minutes and be on your way to restoring those old photographs and preserving your family’s memories for year to come.
There are less expensive digital editing applications but the problem is that they often have very limited capabilities when it comes to doing high quality digital photo restoration. Those cheaper digital photo software packages often utilize a one size fits all approach to photo restoration and they just don’t have the functions to deal with all of the types of damage you may encounter in renewing your old photos.
The other benefit of using Photoshop to fix your old photographs it that you can work in layers. The layers function ensures that you won’t waste an hours work with one little mistake. As you work your photograph you can save each new change as a new layer. If you mess up simply delete that layer and try again. Photo restoration requires patience and attention to detail. Only Adobe Photoshop has the tools to do a quality job restoring your old photographs. Learn Photoshop now and start bringing those old photographs to new life.
Getting The Upper Hand With Photoshop Layer Sets
 Anyone who plans on spending any length of time wandering the halls of Photoshop should consider learning how Photoshop layer sets work.
 Layers are crucial to the entire mechanism of Photoshop design and enhancement.
The Photoshop “Layers” palette maintains a precise history of all your keystrokes… so you don’t have to remember anything.
Layers can be likened to your command post, so it behooves you to spend some time in there. Let’s take a brief look around right now.
Hmm, looks complicated, doesn’t it? Well, unlike a lot of other functions inside Photoshop, Layers really is pretty simple.
Basically, it isolates different sections or transformations so you can work on them without affecting the rest of the image.
Which really comes in handy when you find yourself up against the wall and need to start that particular enhancement over: just throw that layer away.
Your Photoshop Layers box will automatically create a new layer for you for some changes, but you can also create a new yourself.
On your top menu bar, click “Layer,” then “New.” You’ll see a brand new, empty layer appear inside your Layers box. Notice that it has been highlited and the “background,” or original, layer is not.
The highlighted layer is the active layer, meaning that’s the one you’re presently working on. To activate a different layer, simply click on it, and Photoshop highlights (activates) it for you.
Becoming aware of this one function is essential for successfully working in layers.
(Note: Photoshop CS2 lets you activate multiple layers.)
Once you have a few layers inside your Layers dialog box, try clicking the eyeballs next to each one.
You’ll see that in this way you can visually isolate layers so you can tell exactly what it is you’re working on.
At times, you will find yourself creating many, many layers for a single image. When that happens, it gets difficult to find the layer you want to affect.
The solution to this problem lies in creating groups, or “layer sets.” Grouping layers allows you to place them into a folder. (In Photoshop CS, first link the layers, then choose “New Set from Linked” on the side menu of the Layers box.)
In Photoshop 7, you create a group by choosing each one, then clicking “Group with Previous” inside your Layer option in the top menu. Or you can click the tiny folder icon at the bottom of the Layers palette and drag the layers into that layer when it appears, then click the collapse arrow to the left of the set folder to hide the layers inside the folder.
If you want to get rid of the set folder later, highlight it, then click Layer, Delete, Set, then choose either “Set and Contents” or “Set Only.”
Some versions of Photoshop require you to choose your layers and then “Shift-Click” on the bottom folder icon to create a set folder. In Photoshop CS2, you can align layers by choosing View > Show > Smart Guides.
Like all the other fabulous Photoshop functions, Layers offers almost limitless ways to affect your photos and the way you maneuver around inside Photoshop itself.
Master The Basics Of Adobe Photoshop With My 2 Hour Easy To Use Photoshop Video Tutorial.
Please visit: ImtiazTips- Webmaster Articles & Website Design, Development Tutorial for more information about web design.
Saturday, June 5, 2010
How to use the 3 must used tools in Photoshop (Magic Tool, Move Tool and the Crop Tool)
In this article you will how to use the 3 must used tools in Photoshop (Magic Tool, Move Tool and the Crop Tool) and once mastered you'll never be with out them.
Magic Wand:The Magic Wand Tool (W) selects areas of similar color You can change the tolerance (how close the color values should be to the sampled color in order to be selected) of a Magic Wand selection, and choose whether you want the selection to be contiguous (pixels that are touching) or not (in which case, matching colors across the entire document will be selected)
Tips and Shortcuts for the Magic Wand: Hold the Shift key to add another selection to the first.
Hold the Alt key (Option key on a Mac) to subtract your new selection from the first.
Hold Shift-Alt (Shift-Option) to select the intersection of your first and second selections.
Use the arrow keys to move the selection pixel by pixel If you feel that this doesn’t move your selection quickly enough, hold down Shift and use the arrow keys to move the selection ten pixels at a time.
Press Ctrl-J (Command-J on a Mac) to copy the selection into its own layer.
To cut the selection into its own layer, press Shift-Ctrl-J (Shift-Command-J)
If this seems familiar to you, it’s because I mentioned earlier how to copy a layer using the same keyboard shortcut Now that you know that not selecting anything sometimes means that everything is selected, it makes sense that simply by selecting a layer in the Layers palette, you can copy the entire layer by pressing Ctrl-J (Command-J)
To deselect a selected area, click outside of it with one of the Marquee tools, or press Ctrl-D (Command-D on a Mac)
To reactivate your last selection, press Shift-Ctrl-D (Shift-Command-D)
The Move Tool:The Move Tool (V) moves a selected area or an entire layer .
You can invoke the Move Tool temporarily when using most other tools by holding down the Ctrl key (Command key on a Mac)
Tips and Shortcuts for the Move Tool: For most tools, holding Ctrl-Alt (Command-Option on a Mac) and dragging a selected area will temporarily invoke the Move Tool, allowing you to move and duplicate the selected layer quickly
You can also duplicate a layer by holding down the Alt key (Option key on a Mac) while using the Move Tool,
The Crop Tool:The Crop Tool (C) is used to trim images Create a selection using the Crop Tool, then double-click the center of theselection, or press Enter, to crop the image to the size of the selection To cancel without cropping, select anothertool or press the Esc key
Tips and Shortcuts for the Crop Tool: You can use the Crop Tool to resize your canvas Expand your document window so that it’s larger than the image area, and create a crop selection that includes the image and extends onto the gray areas “outside” the image Applying this crop will resize your canvas to include those extended boundaries, making your canvas larger.
Please visit: ImtiazTips- Webmaster Articles & Website Design, Development Tutorial for more information about web design.
[The Money making of a Niche ::Free Data Entry Work :: Imtiaztips Weblog :: Free Webmaster Articles :: More iPod Articles :: Download Freeware Software :: Updated Contents about Google AdSense for NEWBIES.]
Tuesday, March 9, 2010
Learn some advanced speedy little tricks
Adobe Photoshop and just want to take a few tutorials to learn some advanced speedy little tricks here are some neat online Photoshop tutorials to try.
The very newest of the Photoshop tutorials is the lesson on replacing color. This will teach you not only how to replace color throughout the image, but how to go about replacing a series of the same color in various shades with the same kind of color gradient in a different color.
You can take part in this Photoshop tutorial from the vendor’s Web site or can download it as a PDF and read it at your leisure. Should you have no Adobe Acrobat reader installed on your computer you’ll need that to use the PDF but it’s easily downloaded from the site at no charge in just a few quick seconds.
Another of the clever Photoshop tutorial lessons is the means to form your Photoshop text in a circle. This circular text formatting has traditionally called for a vector but the version 5 lets you create your circular text with much more ease, and no vector. This Photoshop tutorial, as with the other advanced training programs, can be read online or with a downloadable PDF.
For those of you who like the creative effect of a curling page you can learn how to do this with a Photoshop tutorial as well. In the same lessons you can learn to use Adobe paths and to create gradients of your own. One whimsical little Adobe Photoshop trick taught through tutorials is called flag in the wind. Created at the request of several Photoshop users who logged onto Usenets, the technique teaches photographers how to use Photoshop’s displace filter to create the look of a breezy movement.
Once the above techniques have been mastered additional advanced Photoshop tutorials teaching things like custom interfaces, and the quick photo effects of masking. One of the fun uses for this tactic is to take one head and place it on the body of another person.
Everyone needs that technique right?
Some of the Photoshop tutorials are specific to materials and fabric. Tutorial number nine, for example, teaches the use of Adobe Photoshop with metal, while the next lesson number ten teaches the use of wood as a Photoshop material.
Textured spheres and round buttons can be designed with Photoshop with any material once you’ve taken the basic materials lessons. Wood texture tutorials teach bevel and button creations, while metal textures can be used for interfaces as well. GIF lessons are important additions to your Photoshop basic tutorials. GIFs are not that easy to master, but their transparency is the reason they’re still important.
You can tackle runny text lessons in advanced tutorials too. Just in case you have a bent for the bloody, say at Halloween time, you can learn this point and click technique with Photoshop classes. Other advanced Photoshop tutorials teach gold and raised text creation, soft text with a beveled look and an alien skin, chrome and textured 3-D text, and layered masking.
Visit Below Links: Updated Contents about Google AdSense for NEWBIES. [ The Money making of a Niche ::Free Data Entry Work :: Imtiaztips Weblog :: Free Webmaster Articles :: More iPod Articles :: Download Freeware Software :: Google Adsense For Newbies ]
The very newest of the Photoshop tutorials is the lesson on replacing color. This will teach you not only how to replace color throughout the image, but how to go about replacing a series of the same color in various shades with the same kind of color gradient in a different color.
You can take part in this Photoshop tutorial from the vendor’s Web site or can download it as a PDF and read it at your leisure. Should you have no Adobe Acrobat reader installed on your computer you’ll need that to use the PDF but it’s easily downloaded from the site at no charge in just a few quick seconds.
Another of the clever Photoshop tutorial lessons is the means to form your Photoshop text in a circle. This circular text formatting has traditionally called for a vector but the version 5 lets you create your circular text with much more ease, and no vector. This Photoshop tutorial, as with the other advanced training programs, can be read online or with a downloadable PDF.
For those of you who like the creative effect of a curling page you can learn how to do this with a Photoshop tutorial as well. In the same lessons you can learn to use Adobe paths and to create gradients of your own. One whimsical little Adobe Photoshop trick taught through tutorials is called flag in the wind. Created at the request of several Photoshop users who logged onto Usenets, the technique teaches photographers how to use Photoshop’s displace filter to create the look of a breezy movement.
Once the above techniques have been mastered additional advanced Photoshop tutorials teaching things like custom interfaces, and the quick photo effects of masking. One of the fun uses for this tactic is to take one head and place it on the body of another person.
Everyone needs that technique right?
Some of the Photoshop tutorials are specific to materials and fabric. Tutorial number nine, for example, teaches the use of Adobe Photoshop with metal, while the next lesson number ten teaches the use of wood as a Photoshop material.
Textured spheres and round buttons can be designed with Photoshop with any material once you’ve taken the basic materials lessons. Wood texture tutorials teach bevel and button creations, while metal textures can be used for interfaces as well. GIF lessons are important additions to your Photoshop basic tutorials. GIFs are not that easy to master, but their transparency is the reason they’re still important.
You can tackle runny text lessons in advanced tutorials too. Just in case you have a bent for the bloody, say at Halloween time, you can learn this point and click technique with Photoshop classes. Other advanced Photoshop tutorials teach gold and raised text creation, soft text with a beveled look and an alien skin, chrome and textured 3-D text, and layered masking.
Visit Below Links: Updated Contents about Google AdSense for NEWBIES. [ The Money making of a Niche ::Free Data Entry Work :: Imtiaztips Weblog :: Free Webmaster Articles :: More iPod Articles :: Download Freeware Software :: Google Adsense For Newbies ]
Subscribe to:
Posts (Atom)